功能点:
在做博客站点的时候,个人中心模块尤为显的非常重要,比如说:
个人发布文章的数量
关注人数 关注多少人
粉丝 哪些人关注了自己
点击按钮:关注某个人 取消关注 操作
表结构设计:
User表
id
name
created_at
updated_at
Posts表
id
user_id fk User.id
created_at
updated_at
Fans表
id
fan_id fk User.id //关注用户
star_id fk User.id //被关注的用户 fan_id 关注了 star_id
created_at
updated_at
以上这是这三张表的基本结构。
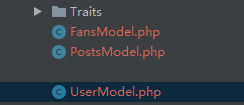
模型
通过命令行 使用 artisan 命令进行创建
E:\phpStudy\WWW\internet-cloud-hospital>php artisan make:model UserModel
Model created successfully.

E:\phpStudy\WWW\internet-cloud-hospital>php artisan make:model FansModel
Model created successfully.

E:\phpStudy\WWW\internet-cloud-hospital>php artisan make:model PostsModel
Model created successfully.

创建完成。
完成之间的关联关系:
UserModel.php
<?php

namespace App;

use Illuminate\Database\Eloquent\Model;

class UserModel extends Model
{
    protected $table = 'users';

    protected $guarded = [];


    //当前用户发布的文章数量
    public function posts()
    {
        return $this->hasMany(PostsModel::class, 'user_id', 'id');
    }

    //当前用户关注的用户
    public function fans()
    {
        return $this->hasMany(FansModel::class, 'star_id', 'id');
    }

    //当前用户的粉丝
    public function stars()
    {
        return $this->hasMany(FansModel::class, 'fan_id', 'id');
    }

    //关注某一个用户
    public function doFan($user_id)
    {
//
//        $fan = new FansModel();
//        $fan->star_id = $user_id;
//        //这样就关注了一个用户
//        return $this->stars()->save($fan);
//
        //当然也可以使用这样的方式
        $param = [
            'fan_id' => 1, //当前登录账号的id
            'star_id' => $user_id
        ];
        return FansModel::query()->firstOrCreate($param);
    }

    //取消对某一个用户的关注
    public function doUnFan($user_id)
    {
        return $this->stars()->where('star_id', $user_id)->delete();
    }

    //是否关注某个用户 我是不是关注了某个人
    public function hasStar($user_id){
        return $this->stars()->where('star_id',$user_id)->count();
    }

}
FansModel.php
<?php

namespace App;

use Illuminate\Database\Eloquent\Model;

class FansModel extends Model
{
    //关注用户
    public function fans()
    {
        return $this->hasMany(UserModel::class, 'id', 'fan_id');
    }

    //粉丝用户
    public function stars()
    {
        return $this->hasMany(UserModel::class, 'id', 'star_id');
    }
}
PostsModel.php
<?php

namespace App;

use Illuminate\Database\Eloquent\Model;

class PostsModel extends Model
{

    protected $table = 'posts';

    protected $guarded = [];

    //获取用户
    public function user()
    {
        return $this->belongsTo(UserModel::class, 'user_id', 'id')->withDefault([
                    'name'=>'wangwu'
                ]);
    }

}
试用示例:
1、关联模型保存
//关联模型保存
$fans = new FansModel();

$fans->star_id=2;
$result = UserModel::query()->find(1)->stars()->save($fans);

echo "<pre style='color:blue;font-size:14px;'>";
print_r($result);
echo "<pre>";
exit;
2、取消关注
//官方文档

$fans = new FansModel();
$fans->star_id=2;
$result = UserModel::query()->find(1)->stars()->delete($fans);
--以上这种写法在新框架中是不支持的


需要使用这种写法:
$result = UserModel::query()->find(1)->stars()->where('star_id', 2)->delete();

//或者使用这种写法
$result = FansModel::query()->where('post_id',1)->where('star_id', 2)->delete();
3、关注用户
        //关注用户
        $result = UserModel::query()->find(1)->doFan(8);

        echo "<pre style='color:blue;font-size:14px;'>";
        print_r($result);
        echo "<pre>";
        exit;
4、取消用户
        //取消对某个用户关注
        $result = UserModel::query()->find(1)->doUnFan(8);   //delete 如果不存在数据则返回 0;若存在 则返回受影响的行数

        echo "<pre style='color:blue;font-size:14px;'>";
        print_r($result);
        echo "<pre>";
        exit;
5、通过create创建数据
返回创建对象的一个实例
  $postParam = [
            'title'=>'test001',
            'content'=>'test content',
            'user_id'=>1
        ];

        $result = PostsModel::query()->create($postParam);  //直接返回创建对象的实例
        echo $result->getAttribute('id'); //通过这样的方式就可以获取到主键id

        echo "<pre style='color:blue;font-size:14px;'>";
        echo 'file:'.__FILE__.' line:'.__LINE__;
        print_r($result);
        echo "<pre>";
        exit;


E:\phpStudy\WWW\internet-cloud-hospital>php artisan test:test
2
获取最后插入数据的id
$result->getAttribute('id');